Most TikTok Shop sellers launch too fast. They upload a few products, flip the shop live, and then wonder why their listings are getting zero visibility. The reality: TikTok evaluates your shop setup from the moment you go live, and incomplete or incorrect configurations result in algorithmic suppression that can take weeks to recover from.
This checklist covers the 12 steps every brand must complete before generating their first order. Work through them in order , each builds on the last.
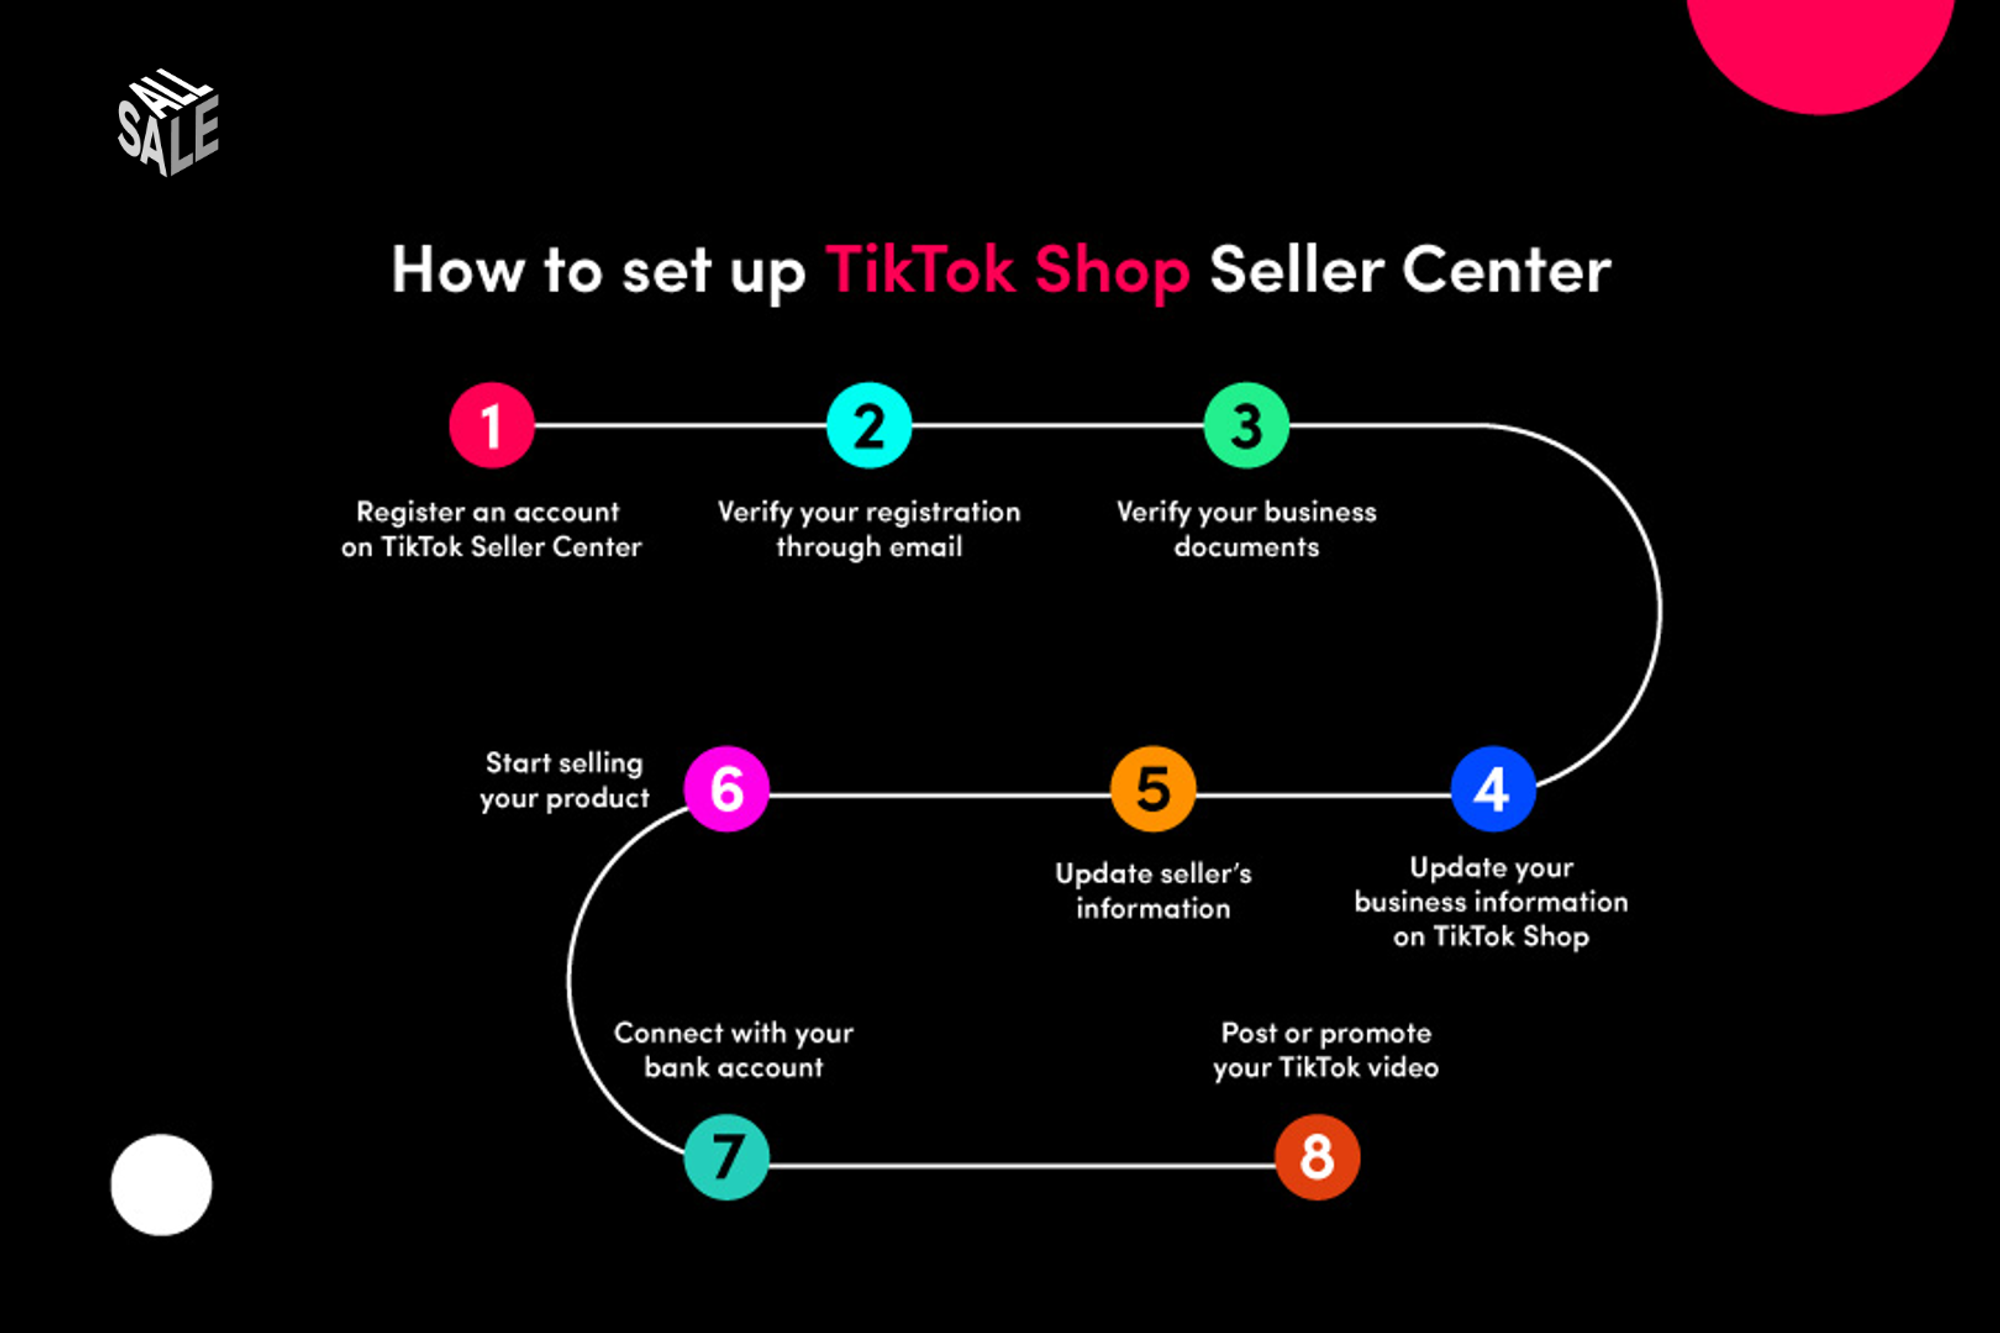
The 12-Step Pre-Launch Checklist
- 1Complete business verification. TikTok requires a verified business entity before your shop can process payments. Upload your EIN, business registration documents, and a government-issued ID for the account owner. Incomplete verification is the single most common reason new shops go live with hidden payment restrictions.
- 2Set up and verify your payment account. Navigate to Seller Center → My Account → Payments and connect a verified US bank account. Run a test payout verification (TikTok deposits a small amount to confirm routing numbers). This step often takes 2–5 business days , do it first.
- 3Optimise your shop profile. Complete every field: shop name, logo (minimum 500×500px), banner image, and shop bio. Write a bio that clearly states what you sell and who it's for. Shops with complete profiles rank higher in Shop Discovery and get more affiliate creator applications.
- 4Upload your first products with optimised listings. Each listing needs: a keyword-rich title (60–80 characters), at least 8 product images (white background + lifestyle shots), a detailed description with bullet points covering key benefits, accurate weight and dimensions for shipping, and all relevant product attributes filled in. Incomplete listings are penalised in search rankings.
- 5Set product photography to platform standards. TikTok Shop's visual requirements differ from Amazon or Shopify. Your hero image must have a white or light background. Video demos (15–60 seconds) on product listings increase conversion by up to 80%. Shoot at minimum 1080p with good lighting before uploading.
- 6Configure your shipping settings. Set up at least two shipping carriers in Seller Center. Define your handling time honestly , if you need 2 business days to ship, set that. Setting an unrealistic handling time and missing it damages your performance score immediately.
- 7Decide on your fulfillment model and apply for FBT if relevant. If you plan to use Fulfilled by TikTok, submit your application immediately , approval takes up to 2 weeks. FBT listings display a fast-delivery badge that significantly improves conversion rates in competitive categories.
- 8Write and publish your shop policies. TikTok requires a published return and refund policy before your shop goes live. Write a clear 15-day return policy (TikTok's minimum) and a shipping policy. Shops without published policies cannot activate the full checkout flow for buyers.
- 9Connect your e-commerce platform. If you're running Shopify or WooCommerce, install the TikTok Shop native integration. This syncs inventory in real time, preventing oversell situations and the performance score penalties that come with them. Set up the connection and run a test sync before launch.
- 10Enable the Creator Marketplace and set affiliate commissions. Go to Affiliate Marketing → Open Plan in Seller Center and set your public commission rate for each product. Minimum viable commission for most categories is 10–15% , anything below this filters you out of most creator searches. Enable Targeted Plan as well so you can invite specific creators to custom deals.
- 11Enable Shop Showcase on your TikTok profile. Connect your TikTok creator account to your Seller Center account and enable the Shop tab on your profile. This allows your organic TikTok content to link directly to product pages, creating a zero-friction path from content to purchase.
- 12Place a test order and complete the full purchase flow. Before driving any traffic, buy one of your own products using a separate account. Verify the checkout works, the confirmation email sends correctly, and the order appears in Seller Center. Fixing a broken checkout after launch is far more costly than testing before it.
The three setup errors that cause the most first-month suppression: setting handling time too short and missing it (damages your ship-out rate from day one), using product images that violate TikTok's visual guidelines (listings get auto-hidden), and skipping the affiliate commission setup (makes you invisible to creators in the Marketplace). Fix these before anything else.
After Launch: Your First 7-Day Priority List
Once you're live, focus entirely on generating your first 10 orders as quickly as possible. Early sales velocity sends a strong positive signal to TikTok's ranking algorithm , it tells the platform that your shop is legitimate and converting. Seed your first orders through your existing audience, email list, or a small Spark Ads campaign before investing in creator outreach.
- Monitor Seller Center daily in the first week , flag any listing rejections or policy notices immediately
- Respond to all customer messages within 12 hours to build your response rate score
- Ship all orders within your stated handling time , not doing so in the first week sets a damaging precedent
- Request your first reviews proactively , use TikTok's native review request feature after confirmed delivery
- Begin creator outreach in week 2 once your shop health baseline is established
Want an expert to audit your shop setup?
I'll review every element of your TikTok Shop configuration and identify exactly what's suppressing your visibility and conversions.
Get Your Free Audit →